English
 Deutsch
AI and Automation


Cygna solutions are designed to put you in control of your data. There are other new related features coming soon that will be covered in additional blog articles such as database segmentation and archiving.
Change auditing can generate a lot of data which can make it difficult to find, analyze and retain the events. Cygna Auditor is designed to overcome these issues in several different ways.
Some activities generate multiple events in the native event logs making it difficult to correlate and figure out what has happened. Cygna Auditor reduces the volume compared to native logging by combining the data in a single easy to consume plain language event.
Another way to reduce the volume of events is to simply not capture unwanted events in the first place with auditing exclusions. This feature is described in detail in the Auditing Exclusions section of the Auditing Policies – Cygna Auditor for Active Directory blog article.
Many organizations may prefer a more conservative approach of capturing and then purging events later. This is a way to control database growth and number of events being retained while providing a configurable window of time to review activities.
The auditing purge rules have flexible configuration options, so you can apply different rules to suit your needs. For example, you could choose to have a rule that keeps Active Directory (AD) audit events for one year and another rule that keeps VMWare data for 90 days. Keep in mind that no events or data are set to be purged by default. Purging rules are designed to be flexible because organizations may have specific internal retention policies or be subject to regulatory compliance mandates based on locale, industry, type of events and data being gathered among other possible requirements.
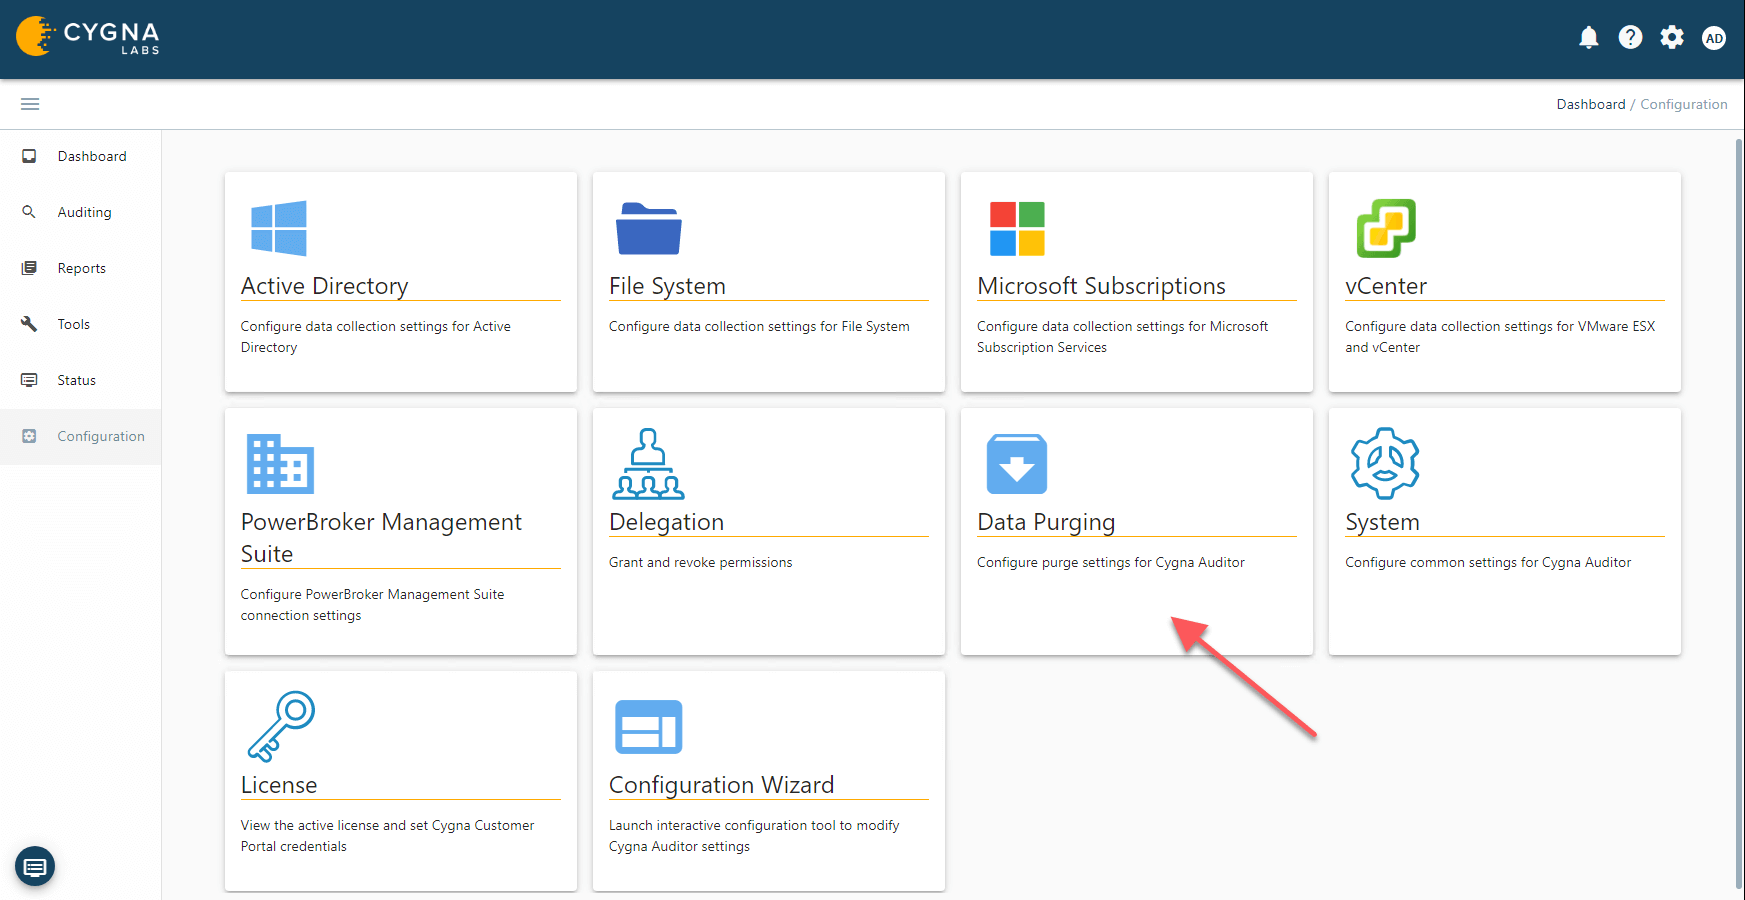
The purge settings can be found by clicking the Data Purging tile in the vertical configuration tab of the product portal. The purge configuration section has two tabs, one each for auditing and data purging rules.
Many organizations have straight forward requirements that are based on how long events and data should be retained. For an example scenario, I will step through the configuration process for an auditing purge rule of AD data. These type of retention rules are simple to configure as there are built-in template rules by source and time. You can easily customize these to suit your organization’s needs by clicking on the pencil icon (on the far right) to open the Edit purge rule window. Once opened, the Rule details tab has fields for the name, description, and a toggle to enable the rule as well as a preview pane of events that would be purged if the rule was enabled and scheduled. The Add/Remove filters tab is where the event purging criteria is defined.
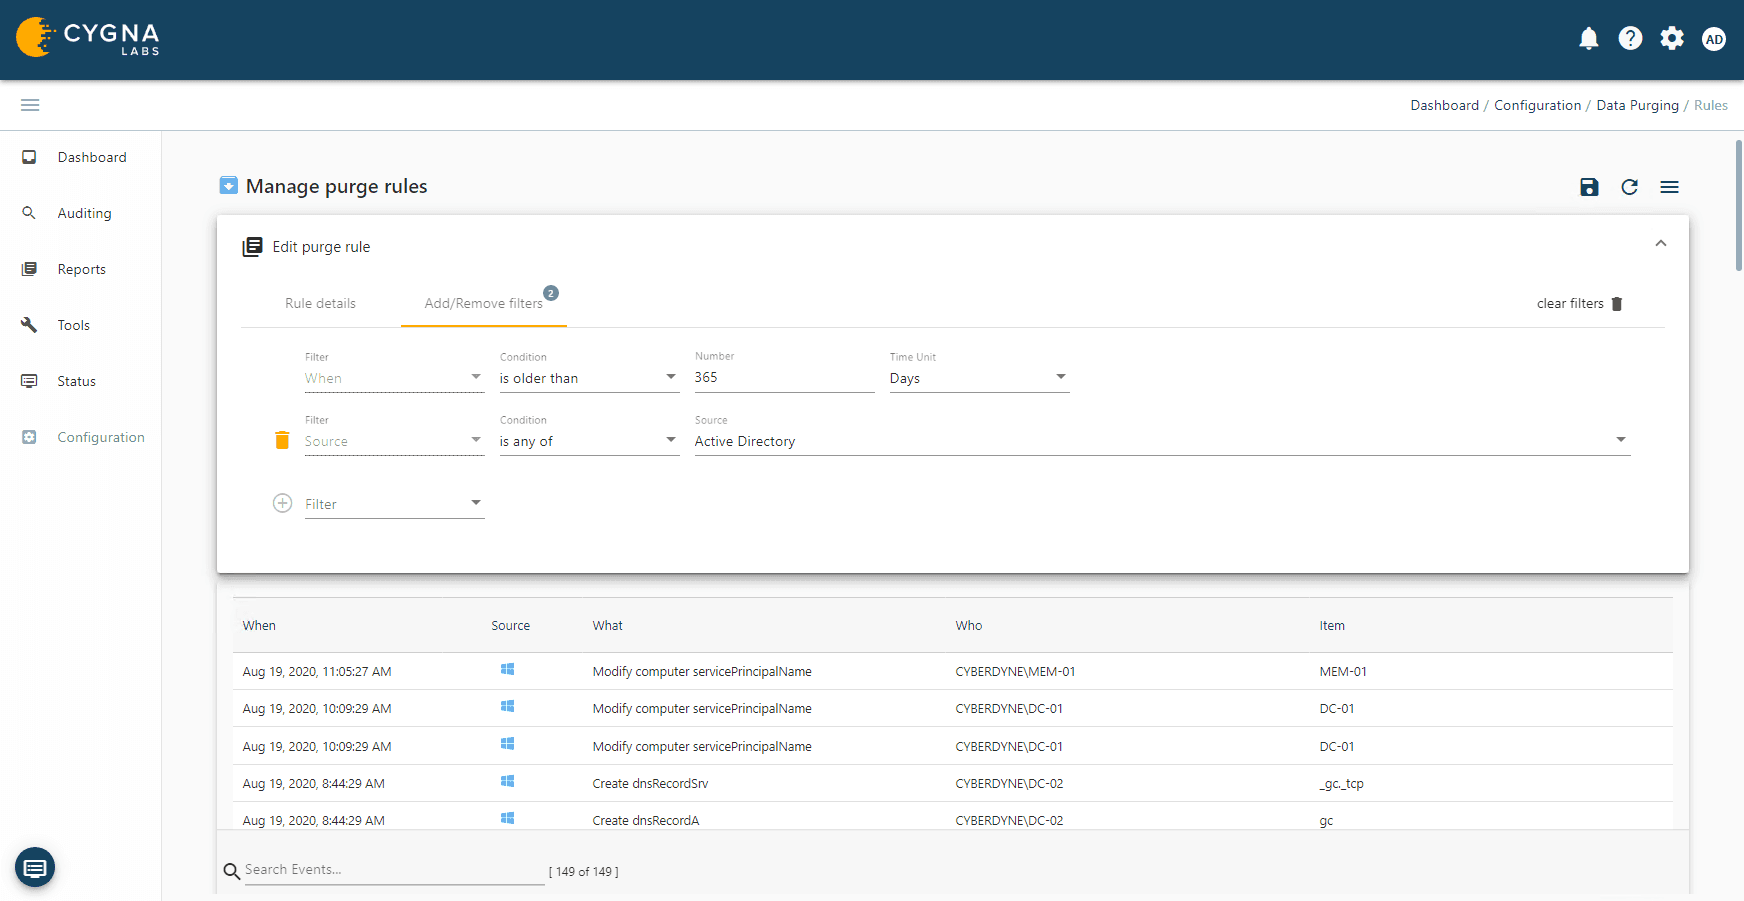
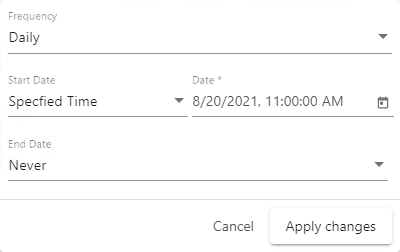
The When filter is mandatory for purging rules to expunge events that are older than x number of days. The built-in AD purge rule is set to purge AD events older than 365 days. Adjust the number of days to your organization’s requirements. You can return to the Rules details tab to see a preview of the events that would be deleted once the rule and purging are enabled. If the results and rule are to your liking, then save the rule by selecting the save icon in the top right hand of the screen. You can enable the rule from the same tab or from the Purge configuration page in the Auditing purge rules tab. Enabling a rule will not start the purging process on its own. The top level Enable purging toggle must be set to enabled for purging to happen. Before enabling purging, we recommend that you set your desired schedule for the purge to happen by selecting the clock icon in the top right hand of the Purge configuration page. The purge schedule has the following options:
Frequency
Daily
Weekly
Bi-Weekly
Monthly
Start Date
Immediate
Specified Time – Calendar picker with date and time options
End Date
Immediate
Specified Time – Calendar picker with date and time options
Once set, click on the Apply changes button. See the following example below.
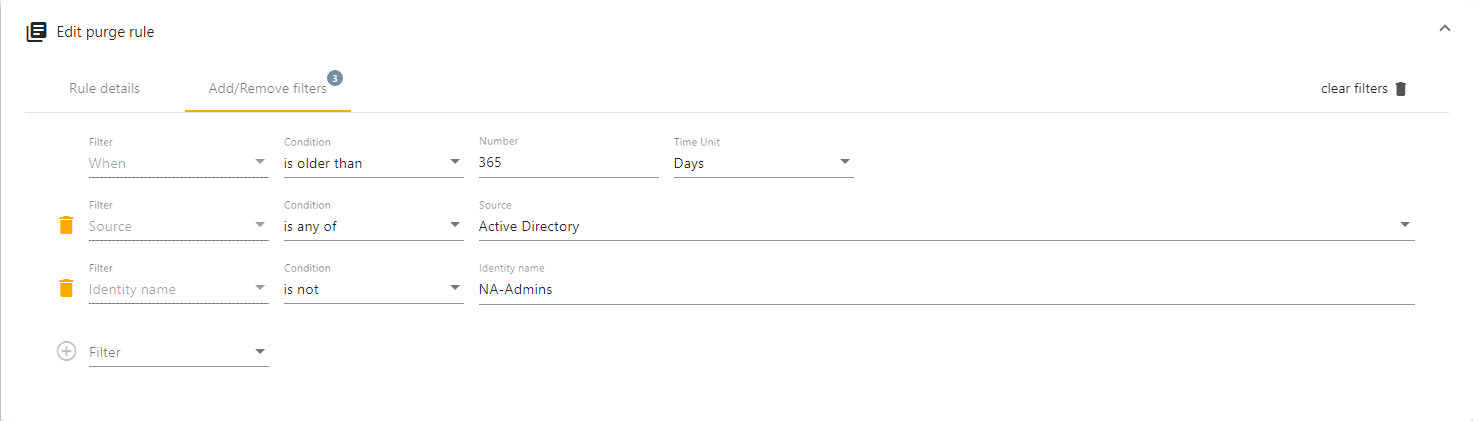
You can also create your own auditing purge rules by clicking on the plus icon in the top right-hand corner of the page or amend existing rules to fit your needs. For example, you could amend the AD purge rule defined above to not delete events from administrative accounts using the Cygna Identity feature. The Cygna Identity feature allows you to group multiple users accounts back to a single identity even if they are from different systems that do not share the same identity provider. See the Cygna Identity Feature blog article for more information on that feature. In this example, the NA-Admins identity is comprised of the administrative accounts from all domains and untrusted forests. The condition is set to “is not” so that those events made by any account defined in the identity will not be purged but all other AD events will. Since these events remain, you could have an additional rule that purges these events from the NA-Admins identity in for example, 2,555 days (7 years).
The data purge rules apply to the data collected by the Cygna recovery modules. When enabled they will remove backup data that is older than configured number of days.
There are a few considerations and best practices that you should consider before enabling purging.
Data retention, regulatory compliance, laws, and policies that your organization is subject to.
We recommend that a DBA or someone with the SQL knowledge / authority take a full backup of the Cygna Auditor database before purging is enabled.
The purging schedule should start at a time when the Cygna Auditor database is the least busy such as overnight when there should be minimal activity and not when the SQL server is actively backing up.
Initial purge time frame. If you have been running Cygna Auditor for some time or there is a significant volume of events that you want to purge, this could put a heavy load on SQL. We would recommend the following approach. Configure the purge rule to remove a smaller subset of events initially to not put too heavy of a load on the SQL server. For example, if you only want to retain a year’s worth of data but the solution has been running for 2 years without any purging. We would recommend that the rule initially be set for events older than 639 days and after the rule has run, change the rule to 548 days. There are many factors that impact the load on SQL such as the number of events to be purged. You can set the same filters as the purging rule in the Auditing tab to see how many events would be purged. The performance and resource availability of the SQL server itself would also greatly impact the purge execution.
Our experienced engineers will fine-tune the demo based on your specific needs. You’ll find out how easy it can be to secure your sensitive data.